Friday, August 14, 2015
Tuesday, February 3, 2015
Fireplace pokers, candle holders, and a razor/brush hangers!
Some of my new work!


 I've been in Colorado for the past month working with some very talented blacksmiths to improve my skill sets. This is some if the work I have done in this time.
Tuesday, October 21, 2014
Pounding Surface out of a Railroad Tie Plate and 4 Spikes
Here's how to make a simple pounding surface for your Smithing.
It's quick, easy, and if all go's well it should be free.

I've been making these anvils for a few years now and I have to say, if nothing else, they're extremely handy!
In the olden days before I had a real "anvil" anvil I made these.
All you really need to do is whack a few spikes into a log and you're good.
(A keen eye would notice that there is some welding in the picture above, that was one of my beginner anvils and I had a stick welder and too much free time. The welding is not necessary)
There's lots of different ways of making anvils, this is probably one of the easiest ways, and one of the cheapest.
Other ways (which depending on your resources my be better suited to you)
are simply taking a piece of Railroad track or some other large chunk of fairly hard steel and setting it in a 5 gallon bucket of cement. Like so...


As always I'd love to hear your questions and read your comments! thanks!
It's quick, easy, and if all go's well it should be free.
I've been making these anvils for a few years now and I have to say, if nothing else, they're extremely handy!
In the olden days before I had a real "anvil" anvil I made these.
All you really need to do is whack a few spikes into a log and you're good.
(A keen eye would notice that there is some welding in the picture above, that was one of my beginner anvils and I had a stick welder and too much free time. The welding is not necessary)
There's lots of different ways of making anvils, this is probably one of the easiest ways, and one of the cheapest.
Other ways (which depending on your resources my be better suited to you)
are simply taking a piece of Railroad track or some other large chunk of fairly hard steel and setting it in a 5 gallon bucket of cement. Like so...
There's also the double hammer method...
This method is very easy to whip up quickly (obviously). but I really don't recommend it.
It's a very small surface and it's pretty unstable.
The hammer handle likes to swing up and crack ya in the noggin!
There's also the method of finding a great big chunk of steel so big you don't need to secure it!
For acquiring this I would recommend going a scrap metal yard and finding a piece that's right for you and buying it at scrap price.
Of course you're buying by the pound so if your faced with the problem of choosing between a nice 50 LBS chunk and a sweet 300 LBS block, you may want to look at the scrap steel prices for some help.
Or if you don't mind going through anvils like toilet paper or peanut butter, there's very cheap cast iron anvils that or meant for decoration that can actually be used to some extent.
 |
| I'm aware this is a Vulcan, but you get my point. |
The problem with these is they do not have the tool steal face that real
anvils have. So that means practically everything you use on this anvil will be harder then it.
However, if you're looking for something fast, free and very easy, this is my solution.
First, know what you're looking for...
 |
| sorry about the low quality |
We're interested in tie plates and spikes. (just as an FYI the clips are great for knife making and just smithing in general)
Tie plates, for those who don't need to step over and around them 3 times a day, look like this...
And spikes look like this...
They both are insanely easy to come by. Especially if your near old Railroad tracks.
You'll also want a stump, the harder the better!
The stump in the first picture is a piece of hickory, and to this day the anvil has never come out of the log.
All you need to do is get your stump how you like it (flat on both sides, on level ground, the right height, etc.) then pound the spikes through the plate and into the stump, just like it was pounded into the Railroad tie it was originally on...
If you do not have a large hardwood stump, and need to use something smaller or softer, overtime the spikes may work they're way out. If so there's several things you can do...
1: You can just whack 'em back in again!
2: If you have a welder you can cut the heads off of the spikes, pound them in so they're flush with the surface of the plate, then plaster an insane amount of weld in and all around the hole and top of the headless spike. Then grind the bumps flat and you're good to go! (If you don't know how to weld this is a great beginner project)
3: Try pulling the spikes out and getting a new stump or new place on the stump.
4: Pull the spikes, get a new stump or new place, heat the plate really hot, not quite glowing, but just red, and then pound it into the stump still hot. It will burn it's way into the log and set it self perfectly into the wood. so now when you hit it, it will wobble less, and not work the spikes out as much.
A quick note for this last one, do not dump water on your plate to get it to cool faster. This will make the plate harder and more brittle, and more likely to crack in half.
Again this is just one of the many kinds of cheap and easy anvils.
If this doesn't work for you I would recommend looking at some of my future posts. I'll be talking about some of the anvils in this post and going more into depth about how you can cheaply get your hands on them!
As always I'd love to hear your questions and read your comments! thanks!
Hope this helped, Jim. -Eric eric.viele@forgeofechos.com
Tuesday, August 26, 2014
Up and at em!
I'll admit, I was slacking (alot) but now I'm back and ready to write more, dish out some more stuff I've learned, and give some more detailed specks on my work and my Etsy listings!
So today I went to the MABA's (Michigan artist blacksmiths association) Black Iron days in Grayling.


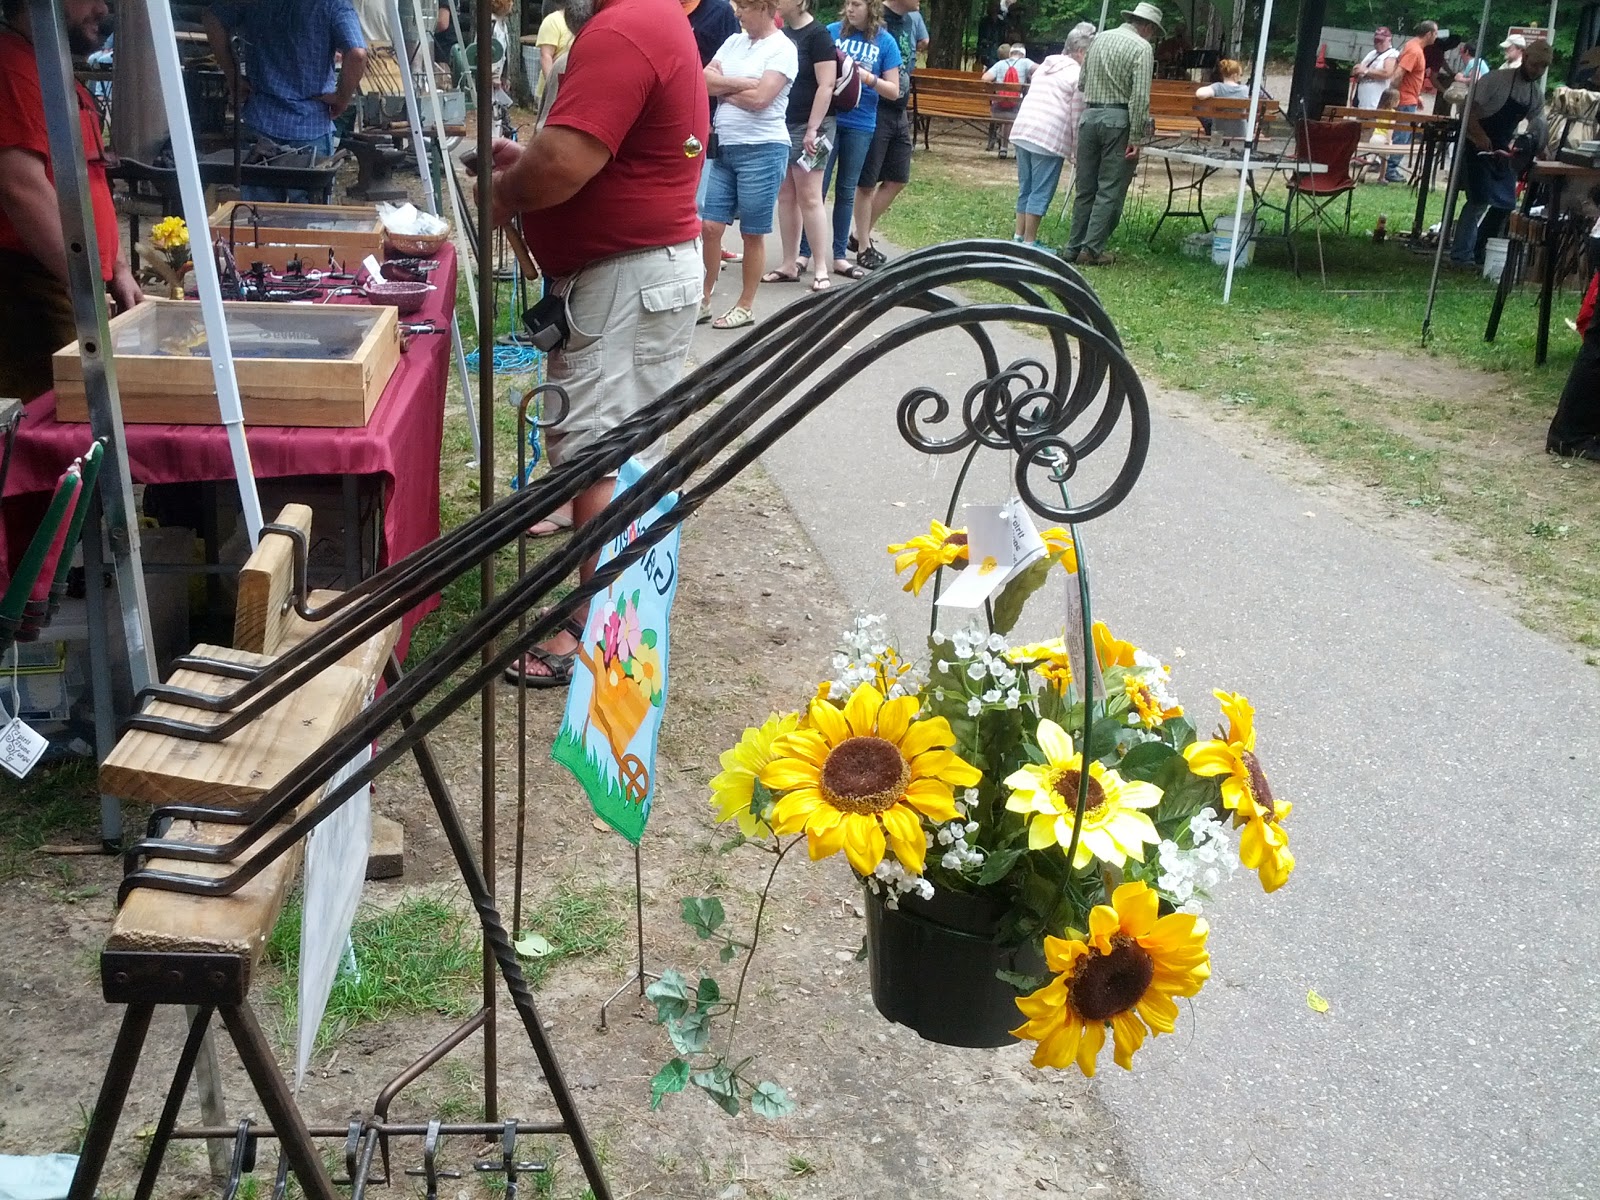 It was amazing! there where so many great smiths there!
I (being me) was nerding out the whole time.
The festival gave me alot of good ideas!
Hooks, Hangers, Tools, Knives, you name it! I was in my element!
While I was there I met with an acquaintance of mine Owen Creteau Jr of CJ Forge,
this was only the second time we had met and I hardly recognized him.
We talked about what we had been making and how we came to be where we are today.
I asked about any other blacksmiths in my area Grass Lake
Apparently there is a hammer-in (open forge) every Tuesday in Parma,
not far from where I am. I'm gonna go there tonight and see whats up.
You're probably tired of hearing about my day so in terms of smithing, which is what I've geared this post to, if you want to learn more about, well practically anything related to smithing I would highly recommend joining the MABA (if your in Michigan), there's info on they're site about where some other smiths are and what they do all through the state, and they have really nice news letter (more like a book) every 2 months.
If your not in Michigan I would assume almost every state has a club of some sort, and a quick google search should be more then enough to get you started!
You should also join ABANA (artist-blacksmith association of north America)
they have some publications "The Anvils Ring" and "The Hammers Blow"
and in all honesty, there's nothing like youtube!
All for now! Tanks,
-Eric
So today I went to the MABA's (Michigan artist blacksmiths association) Black Iron days in Grayling.
I (being me) was nerding out the whole time.
The festival gave me alot of good ideas!
Hooks, Hangers, Tools, Knives, you name it! I was in my element!
While I was there I met with an acquaintance of mine Owen Creteau Jr of CJ Forge,
this was only the second time we had met and I hardly recognized him.
We talked about what we had been making and how we came to be where we are today.
I asked about any other blacksmiths in my area Grass Lake
Apparently there is a hammer-in (open forge) every Tuesday in Parma,
not far from where I am. I'm gonna go there tonight and see whats up.
You're probably tired of hearing about my day so in terms of smithing, which is what I've geared this post to, if you want to learn more about, well practically anything related to smithing I would highly recommend joining the MABA (if your in Michigan), there's info on they're site about where some other smiths are and what they do all through the state, and they have really nice news letter (more like a book) every 2 months.
If your not in Michigan I would assume almost every state has a club of some sort, and a quick google search should be more then enough to get you started!
You should also join ABANA (artist-blacksmith association of north America)
they have some publications "The Anvils Ring" and "The Hammers Blow"
and in all honesty, there's nothing like youtube!
All for now! Tanks,
-Eric
Sunday, January 19, 2014
Grooved and Twisted Railroad Spike Knife!
Here's on of my new blades.

 The handle was a task, but it turned out ok.
Before I twisted it I ground the shaft of the spike smooth, then I sanded it down to a 120 grit finish. I put the line in with a 4 1/2 inch "cut-off" wheel for an

As you might be able to tell it's made out of a railroad spike.
I beat the head out into a long thin bar then I bent it around to a loop.

Before I twisted it I ground the shaft of the spike smooth, then I sanded it down to a 120 grit finish. I put the line in with a 4 1/2 inch "cut-off" wheel for an
angle grinder then I sanded the corners flat and twisted it, the twist was easy after I i thought it through, first I pinched the bottom of handle in a vice and twisted the bottom half 90 degrees, then I flipped it, pinching the base of the blade in the vice and then I twisted the other half 90 in the opposite direction.
That was pretty much it, I gave the blade my own secret heat treat and stuck it on etsy! https://www.etsy.com/listing/174538047/grooved-twisted-railroad-spike-knife? Questions or Comments are more then welcome! Thanks
Friday, October 25, 2013
Ideas for your forge, and how to make one! AND a thermal cement resipi!!!
Ok so here's my forge,
 it's out side so I don't need a chimney, it' burns coal,

and I have an electric blower hooked up to the bottom with a switch that runs to the out side of the forge so I can turn the air on or off easily.
 it's not super duper but it works very well, it'll heat anything up I want it to and unlike my others it hasn't died (yet) I had to tone down the blower alot cause it with out that piece or cardboard you see in the picture above it would blow all the coal away! The actual metal I used for the base was just the steel bottom of an old pressure tank! I liked it cause there was already a hole in the bottom for a blower and the metal was pretty thick, so I got out my trusty angle grinder with a cutting disk on it and I went to work, I sliced the bottom off and welded some legs on so it would stand above the ground, then I made the hole in the bottom a little bigger, put some metal filter over that to make sure no big chucks of coal get down in to the blower, then I just strapped the blower on and put in the cement!
THERMAL CEMENT RECIPE!!!!
so all you'll need is some wood ash (ashes you get from burning wood)
and sand (fine and clean sand works best), it's really easy.
Take 1/2 to 3/4 of a five gallon bucket of the sand
then take about 8-15 cups worth of the ashes and mix it up
then add just enough water to get it all wet and sticky, then it's ready to apply to whatever you need it for!
NOTE: It not professional grade so it wont last forever, but it dose work very well if you can get your mixture right, and you shouldn't have to patch or replace it too often, and when you to, take the old cement out and put it in your new cement, it'll save you time and the stuff that's been bunt actually works better! and when you add the water, you don't want to make it sloppy, just enough to make it kinda like clay, if it's runny add more sand and ash till it's firm, you don't want it too dry, but not to wet either.
Now the reason for thermal cement is for insulation, if your heat can't escape through the walls of your forge it has no other option then to go in to your metal.
if you're looking for what kind of forge you want there are quite a few options!
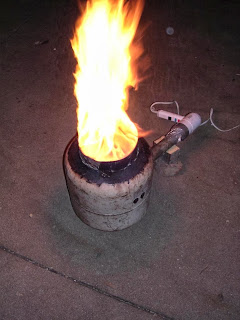
There are Turk burners


 And of course there's always gas.
Or you can just come up with your own thing, that's what I did, pretty much any method of heating metal will work, it should be cheap and officiant though, that's why I burn coal.
it's all about person all preference though, if you like coal go for it, of you like gas, great! just don't be unhappy with your forge, it's one of those things you need to get along with.
if your just starting out and you don't know what you want, I would recommend coal as a start, of you can get a gas forge that'll be fine but you need to take safety precautions and you need to know what your doing just a little bit.
as always I'll take any questions or comments and I'll be happy to give any advice I can, you can contact me through craftsmanofmich@gmail.com or in the comments.
peace out!


and I have an electric blower hooked up to the bottom with a switch that runs to the out side of the forge so I can turn the air on or off easily.

THERMAL CEMENT RECIPE!!!!
so all you'll need is some wood ash (ashes you get from burning wood)
and sand (fine and clean sand works best), it's really easy.
Take 1/2 to 3/4 of a five gallon bucket of the sand
then take about 8-15 cups worth of the ashes and mix it up
then add just enough water to get it all wet and sticky, then it's ready to apply to whatever you need it for!
NOTE: It not professional grade so it wont last forever, but it dose work very well if you can get your mixture right, and you shouldn't have to patch or replace it too often, and when you to, take the old cement out and put it in your new cement, it'll save you time and the stuff that's been bunt actually works better! and when you add the water, you don't want to make it sloppy, just enough to make it kinda like clay, if it's runny add more sand and ash till it's firm, you don't want it too dry, but not to wet either.
Now the reason for thermal cement is for insulation, if your heat can't escape through the walls of your forge it has no other option then to go in to your metal.

if you're looking for what kind of forge you want there are quite a few options!
There are Turk burners
There's big classic forges.

There are slightly more modern forges like mine.


Or you can just come up with your own thing, that's what I did, pretty much any method of heating metal will work, it should be cheap and officiant though, that's why I burn coal.
it's all about person all preference though, if you like coal go for it, of you like gas, great! just don't be unhappy with your forge, it's one of those things you need to get along with.
if your just starting out and you don't know what you want, I would recommend coal as a start, of you can get a gas forge that'll be fine but you need to take safety precautions and you need to know what your doing just a little bit.
as always I'll take any questions or comments and I'll be happy to give any advice I can, you can contact me through craftsmanofmich@gmail.com or in the comments.
peace out!
Thursday, September 26, 2013
How to know what you want to make, My story, and possibly some inspiration
So you'd like to Blacksmith, you don't know what you want to make, what you could make, or how serious you want to be about it. Sound familiar?...
Well all i can say is "no pressure!" you should be relaxed about Blacksmithing, there's no reason to set yourself a schedule or a strict time in which you need to Smith, by doing that you'll feel like you HAVE to do it! that way you can't think and relax, and you need to relax to have good ideas.
As far as advice go's, mine would be a question, "what do you think is cool?" just think, you wander through a market place or a museum or you watch TV and you see something REALLY COOL!!! made out of metal.
well that "REALLY COOL" thing is probably what you want to make? think about it, why would you not want to make something that's "REALLY COOL"?
Another thing you might be asking your self is "can i really do that?"
Well why not?! If you don't think you can make it but you want to, then go head and try? So what if you fail, that's how you learn, whenever I make something that turns out good I can look back and see that I hardly learned anything!
but if I make mistake after mistake and in the end fail miserably (happens alot) when I calm down, (trust me you'll get angry) I can look back and see that I've learned a whole lot!
I started out knowing exactly what I wanted to make, Knives, me and my best friend growing up, all we wanted to do was make swords knives a daggers!
Our first creations where old steel pipes, that I would flatten 3 1/4 of in a vice and take an angle grinder to the tip and the flattened edge to make it sharp, we where probably about 5-6 at the time, we where obsessed with Teenage Mutant Ninja Turtles and almost every legend of a great warrior there ever was.
Today the Turtles have been canceled (although Casey Jones is still pretty cool) and the flattened pipes have lost there charm.
I remember the first real knife we ever made, it was an old bar of low carbon steel that I had cut into the shape of a bowie and I had ground some teeth into the back, we put it in a camp fire and fanned it with a piece of foam board until it was cherry red, then we pulled it out and stuck it in a bucket of water.
It was soooo dull and soooooooo soft, I could bend it in my hands!
But it was our first knife, and we loved it, till it got twisted into a pretzel by some machine we left it by, I don't really remember, but it's in the scrap pile now and we've moved on to better things.
Later I wasn't seeing my best friend Griff as much, he had moved into junior high and I had been unschooled all my life and had no desire to go sit in a class room.
and I was dating Griffs sister Greta at the time so more of my time was spent on her then it was on him.
But we still had a passion for knives! In the cooler days of the summer Griff would Come over and we'd heat up old sections of rebar (low carbon steel) and pound it flat with the back end of a 4 pound axe on an old piece of railroad track my father had given me, and we'd sharpen them with an old bench grinder, then heat 'em up and quench 'em in water, oh yes, industry!
Soon Griff started football and so our time together was brought to a "maybe on the weekend" base, so I went out on my own! All I had was my knowledge and my experience, (witch wasn't much) I my father let me use his stick welder and I stuck a forge together out of any old pressure tank, I hooked an old electric inflatable mattress blower to it for air and I chopped wood into small chunks for fuel, it worked better then anything I had ever had! I could get my metal as hot as I wanted!
I was able to mount my Railroad track anvil to a hickory stump so I could stand while I worked and for Christmas my mother got me a 3 1/2 pound sledge hammer, everything seemed to be coming together and it wasn't long before I got some real good metal, my dad replaced the suspension on his car and I got two old coil springs, spring steel! I worked with those and got my knife making technique down! If all my tools worked I could make any hand knife I wanted!
Soon after I wanted to make a sheath for one of my knives, my mother took me to a crafts shop and I got a bag of scrap leather, I sewed my first sheath and loved it! that's where my leather working came from! since then I've been making leather work for knife and non knife related things, that's also how I got started on wood working, I made a wooden handle for a knife and loved it! I've been working with wood since then as well but mostly it's been Blacksmithing!
Well in short that's my story, since then I've gotten proper tools, a coal burning forge, and better materials, it's been a journey, but it's still only beginning. and what's happened since then and what's going to happen is really what this blogs all about!
If you have any questions please comment or feel free to Email me at craftsmanofmich@gmail.com and thanks for reading.
Subscribe to:
Comments (Atom)